Turning your garage floor into a coating of epoxy or polyaspartic can significantly improve its appearance, durability, and functionality, but when it comes to choosing between a DIY approach and getting a professional to do it, there are many considerations that you need to have in mind. For less experienced homeowners in the US, understanding the difference between these two approaches is crucial to making a wise decision. In this guide, we will break down the difference between DIY garage floor coating and hiring a professional to do it, mentioning the main concerns with an actual example so that you can make the best choice for your garage.
Cost & Budget: Unpacking the Price Tag
The main difference between a DIY approach and hiring someone to do it is the garage floor coating cost; as we walk through this examination, you will see that the cheaper options are not always the best ones, considering long-term economic effects.
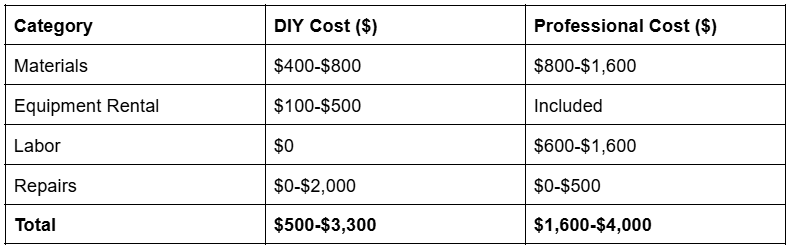
The garage floor coating cost can significantly vary based on many factors, like the type of coating you want to use, the size of your garage, the current condition of your garage, and your location. Here is a short comparison of the two approaches:
- DIY Garage Floor Coating Kits: Costs ranging from $0.50-$3.50 per square foot for materials and some basic tools
- Professional Garage Floor Installation: usually costs around $3.00 - $12.00+ per square foot for materials, labor, prep, and cleanup.
For example, a 400-square-foot garage in Houston would cost $800 for a DIY kit; on the other hand, it would cost $2,400 for a professional epoxy installation. You might think that DIY is much cheaper, but you should not fall for it that easily; the DIY approach comes with some hidden costs.
Hidden Costs in DIY
- Equipment Rental: In order to do the DIY garage floor coating, you need some equipment for surface preparation, and renting it is the most rational way.
- Concrete Grinder/Scrubber: $50 - $150 per day.
- Wet/Dry Vacuum: $30 - $50 per day.
- Pressure Washer: $40 - $80 per day.
- Preparation Materials:
- Degreasers, Cleaners, Etching Solutions: $20 - $100.
- Crack Fillers: $20 - $50 per kit.
- Patching Compounds: $30 - $80.
- Tools & Supplies: You will need some items like rollers, brushes, squeegees, mixing buckets, safety gear like a respirator, gloves, eye protection, painter's tape, and drop cloths. These can add $50 - $200+.
- Unexpected Repairs: During the coating process, you might make some mistakes, like uneven application, so you need to buy more materials or even grind again to fix it and start over. This can make a huge budget overrun. To avoid this, consider an extra 10% of the budget to cover unexpected issues. You can use a garage construction cost estimator to account for these extras.
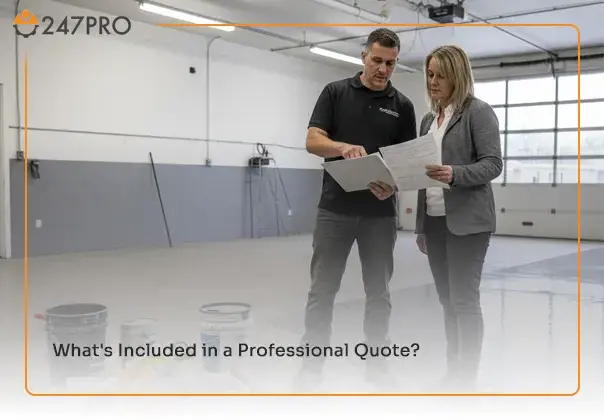
What's Included in a Professional Quote?
A professional quote should be comprehensive and detailed to cover most if not all, aspects of the job. There are some tips that you need to be careful to include in these quotes:
- All Materials: High-quality materials, surface preparation like grinding and patching, application, cleanup, and even a warranty(1-5 years).
- Extensive Prep Work: This is the one item that you can expect to see in a professional quote; it usually includes:
- Diamond Grinding.
- Crack Repair & Patching
- Deep Cleaning & Degreasing
- Moisture Testing
- Professional Application: Experienced workers will ensure the quality of work and prevent any unexpected issues.
- Cleanup: Disposal of all waste must be removed from the working site and transferred to special places.
It is best to request itemized quotes from some construction project management firms to confirm inclusions.
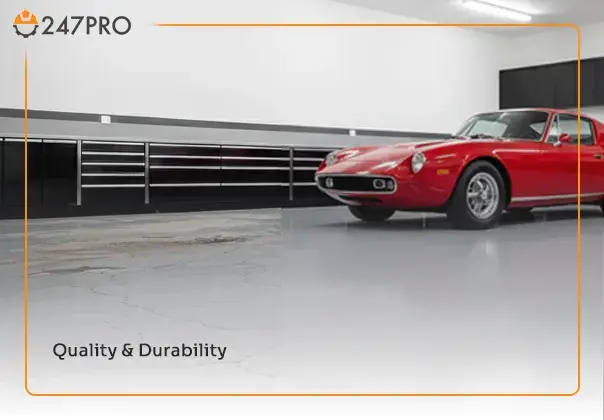
Quality & Durability
While DIY approaches are seemingly way cheaper than hiring a professional to do it for you, there are several factors that can lead to higher long-term costs.
- DIY: DIY kits often use lower-quality materials that are cheaper but are prone to peeling, chipping, or hot tire pick-up within a few years, requiring you to redo the job. Generally, they will last between 2 and 5 years.
- Professional: they will last between 5 and tand15 years as high-quality materials and superior prep like diamond grinding are used, which are resistant to hot tires, chemicals, and heavy traffic.
- Re-application Costs: Mistakes during the process are often more expensive than the initial application. In this situation, you have to pay for strippers, grinders, and new materials.
- Hire professionals: look for construction job placement agencies to hire professionals who can guarantee the quality of the job.
What's the Difference in Material Quality?
- DIY Kits: Epoxy garage floor costs often contain water-based or low-solids epoxy (50-70% solids). While it's easier to apply, they offer thinner coats, lower chemical resistance, and less abrasion resistance. They are designed in a way that homeowners use them efficiently, but not to maximum performance.
- Professional Products: They use high-solids epoxy (80-100%) or polyaspartic coatings. They are often unavailable for homeowners to purchase on the market.
- 100% Solids Epoxy: They are thicker, more durable, and have better chemical resistance in comparison to water-based epoxies.
- Polyaspartic: thanks to new technologies, polyaspartics offer better abrasion resistance, faster cure times, excellent chemical resistance.
How Will the Finished Look Compare?
- DIY Job: This can often look uneven or patchy if not applied properly. Achieving a perfectly smooth and even finish requires skill and experience, which novices are less likely to have.
- Professional Job: A professional installation delivers a smooth and glossy finish. Experienced contractors have the tools and expertise to handle such projects that will provide a factory-like appearance.
Will a DIY Coating Withstand Heavy Use, Chemical Spills, or Hot Tires?
- Heavy Use: Most DIY coatings will struggle with heavy vehicles and will show wear and tear much faster than professional systems, approximately 1 to 3 years.
- Chemical Spills: DIY epoxies do not have proper resistance to harsh chemicals like oil, gasoline, brake fluid, and battery acid. Spills can stain or even degrade the coating. On the other hand, professional coatings have higher chemical resistance.
- Hot Tires: Hot tire pickup is a common failure point for many DIY kits. Professional polyaspartic or high-quality epoxy systems are specifically designed to resist this.
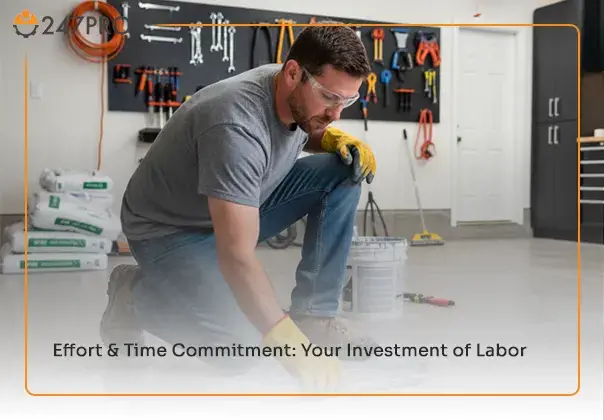
Effort & Time Commitment: Your Investment of Labor
When it comes to choosing between a DIY garage floor coating and a professional kit, money is not the only factor. You should consider the effort and the time you have to spend on this job. A DIY garage floor coating project is a multi-day task due to extensive preparation and cure times. Based on the existing condition of your site and its size, the total project would take 3 to 5 days.
- Preparation: would take 1 to 2 days
- Clearing out the garage.
- Cleaning, degreasing, and etching the concrete.
- Rinse and let it dry completely.
- Filling the crack.
- Taping off edges.
- Application: would take 1 to 2 days
- Mixing the coating
- Applying the first coat
- Applying a second coat or decorative flakes
- Topcoat the garage
- Cure Time: Waiting for the coating to set for 24 to 72 hours
- Cleanup: it would take half a day to dispose of materials and cleaning tools
Is the DIY Process Genuinely Easy?
Most of the time, DIY kits are designed to be user-friendly, but they require some basic understanding of coating application, attention to detail, and patience. You don’t need to be a professional, but experience with rolling paint evenly and working with fast-curing products can be beneficial.
The skills you need to have are basic, concrete knowledge, physical stamina for preparation work, and the ability to follow the kit instructions. Be careful, as most DIYers get halfway through and realize that the preparation is way more complicated than expected, or they go with the wok but make errors like improper mixing; these errors can cost $500-$2,000 to fix.
How Much Disruption Will a Professional Installation Cause?
Professional installations are usually much faster in terms of active work, but the garage will be unstable for some time. It usually takes 1 to 2 days for the crew, and the garage will be unusable for 24-72 hours during curing. But if you perform a DIY approach, you have to wait approximately 2 to 5 days longer, as the materials are different.
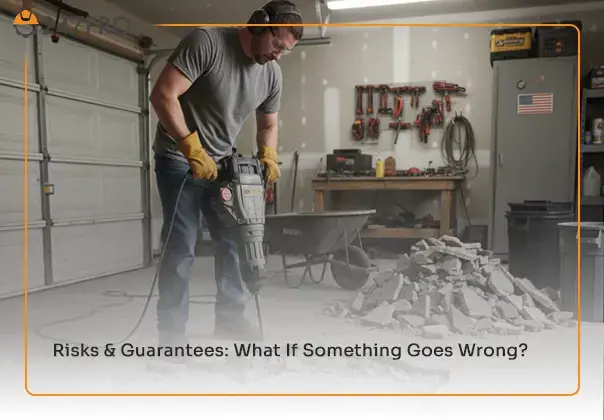
Risks & Guarantees: What If Something Goes Wrong?
Both DIY kits and professional installation are prone to some risks and problems, but it is essential to understand the long-term risks of each and choose the proper one.
- Improper Surface Preparation: The first problem is that the concrete isn't clean, dry, and properly profiled. This can lead to bubbling, peeling, and delamination.
- Moisture Issues: Concrete with high moisture content can lead to bubbling and peeling as the moisture tries to escape.
- Incorrect Mixing: Improper mixing leads to soft spots or areas that don't cure properly.
- Application Errors: Uneven thickness, missed spots, or applying in unfavorable temperature and humidity conditions can lead to poor appearance and reduced durability.
- Ignoring Cure Times: Driving on the floor too soon will cause tire marks, peeling, and damage.
If Something Goes Wrong with a DIY Job, Am I on My Own to Fix It?
DIY does not provide any warranty for application errors. So you are the one who is responsible for any problems, fixing, and redoing the work. This is one of the hidden costs of DIY garage floor coating.
Professional installation, however, comes with a warranty that covers material defects and application errors for a specified period, for example, 5 years, 10 years, or even a lifetime, based on the service you choose.
Decision Making: Choosing the Right Path
For more information on how to estimate the cost of garage floor coating, read “The Ultimate Guide to Basement & Garage Finishing Costs” to understand how to perform it accurately.